Showing posts with label recipe. Show all posts

Tuesday, November 13, 2012

Tasty Tuesday: BBQ Green Beans

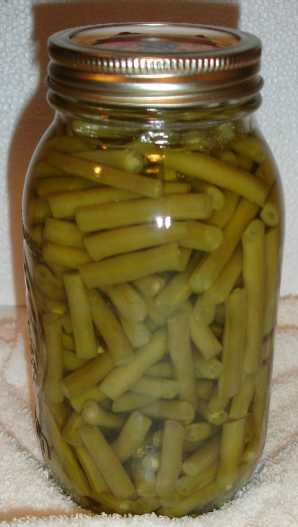
My husband and I both grew up in homes where green beans were a frequently served vegetable. My mom canned her own home grown green beans. In the summer, if I sat down for any reason, a pan of green beans would magically appear in front of me for my snapping pleasure. Small price to pay for home canned green beans year 'round!

We still eat green beans frequently, but over time I have collected a few recipes that give a new twist to the rather tired looking store bought canned beans. The following recipe is from an old church cookbook. I have been making this for over 25 years and they are always well received. The recipe can be tripled and heated in a slow cooker for a large crowd or a pot luck event.


BBQ Green Beans

2 14.5 oz cans green beans, drained
1 can tomato soup
1/2 cup brown sugar
6 bacon slices, diced
1/4 cup onion, diced

Brown diced bacon & onion in skillet, drain well.

Place green beans, brown sugar, & tomato soup in casserole dish and mix together.

Stir in bacon & onion.  Bake at 325 degrees for 1 hour.

For pot luck I triple the first 3 ingredients, use 1 pkg of bacon, and 1 whole onion. I place into a slow cooker and cook until heated through.

I know this sounds very different, but it really is a delicious recipe. Give it a try.

Bon appetit! ~Marla


Sunday, November 11, 2012

Tater Tot Casserole, Updated

This is not my first post for Tater Tot Casserole, but this is an updated version that fits my family a little better. This recipe is based on the Duggar's Tater Tot Casserole. With a few tweaks I have made it my own, a little higher in lean protein, and a little lower in carbs.

Tater Tot Casserole

2 lbs lean ground beef &/or ground turkey
Nature's Seasons Seasoning Salt
2 lbs frozen tater tots
1 cup shredded cheese
1 can cream of mushroom soup
1 can cream of chicken soup
1 can evaporated milk

Preheat oven to 350 degrees. Remove tater tots from freezer. Brown and season meat to taste. Drain any fat and place meat in the bottom of an ungreased 9x13 baking dish. 

Sprinkle with shredded cheese, variety of your choice, I like a 3 cheese variety. Cover evenly with tater tots.

 Mix soups and milk in a bowl and pour evenly over tater tots. Bake uncovered in a 350 degree oven for 1 hour. Serves 8-10.

Enjoy! ~Marla

Tuesday, October 16, 2012

Tasty Tuesday: The Smells of Home

What makes a house feel like a home? For me it is the aroma. I have heard of people comment on how they love the smell of Pine Sol or bleach, denoting a freshly cleaned home. Other people enjoy the fragrance of fresh cut flowers or floral candles or room fresheners. My favorite aroma for a home are the fall smells. Apples baking in pies, nutmeg and cinnamon simmering in a pot of cider on the stove, a pumpkin pie and banana bread cooling on the counter, wood burning in the fireplace. When I experience these aromas I am transported...suddenly the house feels cozy, inviting, homey. 


During the fall the baker in me comes out to play. It cools off enough to use the oven again, and the spices of fall beckon. One thing I do enjoy about showing my home in the fall is the ability to add to that homey feeling for the potential buyer by putting out breads and having a big pot of spiced cider on the stove top. It is so welcoming. 

Here is a recipe to get you started on that fall baking, a yummy apple crisp from Betty Crocker! Bon appetit! ~Marla


French Apple Dessert

Streusel Topping
1
cup Original Bisquick® mix
1/2
cup chopped nuts
1/3
cup packed brown sugar
3
tablespoons firm butter or margarine
Filling
6
cups thinly sliced peeled tart apples (4 to 6 medium)
1
cup granulated sugar
3/4
cup Original Bisquick® mix
3/4
cup milk
2
tablespoons butter or margarine, softened
1 1/4
teaspoons ground cinnamon
1/4
teaspoon ground nutmeg
2
eggs
Topping
Ice cream or whipped cream, if desired

  • 1Heat oven to 350°F. Grease 13x9-inch (3-quart) glass baking dish with shortening or cooking spray. In small bowl, mix 1 cup Bisquick mix, the nuts and brown sugar. Cut in 3 tablespoons firm butter with fork or pastry blender until mixture is crumbly; set aside.
  • 2Spread apples in baking dish. In medium bowl, stir remaining filling ingredients until blended. Pour over apples. Sprinkle with topping.
  • 3Bake about 55 minutes or until knife inserted in center comes out clean; cool slightly, about 30 minutes. Serve warm if desired with ice cream.


Tuesday, August 14, 2012

Tasty Tuesday: Pinterest Cooking

Do you Pin? If not you are missing out on one of the most addictive internet activities available. I love Pinterest, it totally satisfies my urge to rip out magazine pages and save them. What? You've never done that? I confess, if I am scanning a magazine and come across an idea or recipe that I want to try...rip, out it comes. Pinterest is much the same, but with no mess. Instead everything is neatly organized into categories of your own choosing. Heaven!


But I digress. This post is specifically about some of the great recipes I have tried from my Pinterest collection. Enjoy! And to get you in the mood, here is a great remix in honor of the great Julia Childs 100th birthday.http://youtu.be/80ZrUI7RNfI

OK, while not technically a recipe, this is by far the most amazing thing I have discovered through Pinterest. I will never boil an egg again! I now bake my hard cooked eggs! So much easier! 325 degrees for 25-30 minutes...and they peel easier as well.http://pinterest.com/pin/283797213988836056/

Need a great recipe for Chicken Enchiladas? This one is definitely a winner! 
http://joyful-mommas-kitchen.blogspot.com/2011/09/white-chicken-enchiladas.html

I found a great Beef Stroganoff recipe...the beef is super tender.
http://secretingredientislove.blogspot.com/2012/02/beef-stroganoff.html

One of the cooler recipes I have discovered is for Artisan style bread, baked in a dutch oven. I am not normally a bread maker...but this is super easy, and came out perfect on my very first try!
http://simplysogood.blogspot.com/2010/03/crusty-bread.html


Hopefully this gives you a few ideas for dinner, as well as what Pinterest has to offer. 

Bon Appétit ~Marla

Tuesday, November 15, 2011

Tasty Tuesday: Maxine's Homemade Noodles

Last week we started a new family tradition. We had a noodle making day! A few of the women in our family got together for a day of floured fun and made noodles from a recipe that was my mother's. Of course my mom never actually wrote down a recipe...she learned from her mother and her grandmother Mary Ann. I actually wrote the recipe down the last time I made noodles with my mom. 


Making noodles with Grandma was something that both my daughter and my niece got a chance to do when they were younger. The memories in the kitchen last week were wonderful. Mom has been gone for 7 years now, but it seemed she was there with us as we clumsily tried to mimic her skills. Enjoy the recipe and the pictures...we had a great time! (A big thanks to my niece who isn't in these pics, because she was busy taking them!)


Maxine's Homemade Noodles

3 cups flour
3 eggs
milk
salt
pepper

Flour a large working surface very generously...a counter or table, covered with tea towels or pastry cloths, works fine. 

In a large mixing bowl scoop in the flour and form a well.

In a small mixing bowl add 3 eggs, reserving an egg shell. Using half an egg shell, measure in a half shell of milk for each egg used.

Whisk together eggs and milk and salt and pepper as desired...I am fairly generous with the salt and pepper as it will be mixed into the flour. Pour this mixture into the flour well.

Using a fork begin stirring egg mixture allowing flour to be slowly pulled in from the sides of the well.

As the dough thickens into a ball, use your hands to work the flour in until the dough is fairly stiff. Don't worry about any leftover flour in the bowl...save it for later. Place on floured surface and roll with a well floured rolling pin.

Using rolling pins, roll dough until very thin. No points for presentation here! Just make sure it is very thin and very well floured. This is where that leftover flour comes in handy...sprinkle it on the dough as needed during rolling.

Roll well floured dough into a tube and let dry for at least 15 minutes.

 We took a lunch break while our dough dried. 

We made a lot of batches!

Time to cut the noodles! Cut them a little thinner than you want them...they will expand during cooking. You can cut them on a diagonal for shorter noodles, or straight for longer ones. 

As you cut them place in a bowl. Make sure you unwind the noodles and flour them well. All this flour is a great thickening agent when you are ready to cook them.

 We were saving ours for the holidays, so into plastic bags they went. They can be kept in the refrigerator for a few days or in the freezer for a few months. No need to thaw before cooking if frozen.

A 3 egg batch will serve 4-6 people. They can be cooked in broth, stock or water. Simply drop into boiling liquid slowly, stirring as you had the noodles. Cook until tender. Add leftover flour from bag to thicken. 

Bon appeit! ~Marla


Tuesday, November 1, 2011

Tasty Tuesday: Chili


Nothing welcomes in the fall like a big simmering pot of chili! I grew up without even knowing that you could purchase chili in a can; My mom's homemade chili was delicious and nothing could warm you up on a cold night quite like it. I still love homemade chili. I do not make it exactly like my mom's I am sure...after all, she never followed a recipe. And I have learned a way to cheat just a little without affecting the taste at all. I use a convenient package of spices instead of measuring them out myself. It saves me a little time measuring and replenishing my spices. But the end result is still a wonderful, flavorful, thick bowl of chili.

Chili

1 box Carroll Shelby's Chili Kit
2 lbs. lean ground beef
1 lb. flank steak, cubed
2 cans Chili Beans
2 cans diced tomatoes, chili style
1 can tomato sauce
1 medium white onion, diced
14 oz. water, use an empty can

In a large pot, brown meat and onion over low heat. If you use very lean beef, you will not need to drain it and it will retain more flavor.

 Open the Chili Kit and add the Chili seasoning, salt and cayenne packets to the browned beef. Use the cayenne according to how hot you want your chili. I use the entire packet for moderate heat. Stir well and add the  tomato sauce. Simmer, stirring occasionally for 15-20 minutes. Add chili beans, tomatoes, and about 2/3 of the can of water to beef. Simmer for 1/2 to 2 hours. The longer it simmers, the richer the taste.

 About 15 minutes before serving add the masa flour if a thicker chili is desired. To do this mix the remaining water and masa flour together to make a slurry. Add this to the chili and stir well. It will thicken the chili. 

You can add and subtract to this recipe depending on your tastes. Add bell pepper, remove the onion, more cayenne, no beans, etc. Serve with whatever chili fixings you like. Green onion, sour cream, cheese, and Frito's are my favorites!

Bon appetit ~Marla

Tuesday, October 11, 2011

Tasty Tuesday: Leftover Spaghetti Bake

When I make a meal I tend to make large quantities. My husband and I actually enjoy leftovers. I made traditional spaghetti with meat sauce Sunday and had quite a bit of leftover pasta...this is what it became for Monday night. 


Leftover Spaghetti Bake

16 z. cooked spaghetti or angel hair pasta, really any pasta will do
3 eggs
1/3 cup shredded Parmesan cheese
1 cup cheddar cheese
3 cups meat sauce
2 cups shredded mozzarella cheese

Preheat oven to 350 degrees. Combine pasta, eggs, and Parmesan cheese in a bowl and mix well. Pour into a well buttered 9x13 baking dish. Sprinkle with cheddar cheese. Layer on the meat sauce and top with mozzarella cheese. Cover loosely with aluminum foil and bake for 45 minutes. Remove foil and bake until cheese well melted, about 15 minutes. Let rest for 10 minutes, then cut and serve.


The great thing about this recipe is that you can make it to suit your family's taste. You can replace the cheddar cheese with cottage or ricotta, you can add mushrooms, onions, olives, and green or red peppers as desired.

Bon apetit ~Marla

Tuesday, October 4, 2011

Tasty Tuesday: Butternut Squash

One of my favorite things about fall is the food. As the weather becomes cooler I start craving foods that lend a sense of warmth. One of these foods is butternut squash. I like zucchini and summer (crook neck or yellow) squash, but in the fall I start to have a hankering for the butternut or acorn varieties. 


Butternut squash is plentiful in the fall & winter, and nutritious to boot! It is low in calories and teeming with fiber, beta carotene (vitamin A), vitamin C, folate, potassium and vitamin B6, just to name a few. Add the fact that the high amount of antioxidants can have a anti-inflammatory effect...and you have a super food!


Butternut squash has a sweet nutty taste, and despite it's look, it is easy to cook. Here is an easy recipe to get you started.


Basic Roasted Butternut Squash

1 butternut squash

Preheat oven to 350 degrees. Cut squash in half lengthwise. Scoop out seeds. Brush with a little olive oil, place cut side down on baking sheet or in a casserole dish and bake until soft, about 45 minutes.

Variations: You can season it with whatever you wish after cooking or you can season it before cooking and roast it cut side up. Ideas? Nutmeg, salt, pepper, brown sugar, allspice, pumpkin pie seasoning, butter, cloves, ginger.

Feeling more adventurous? Give this recipe a try!


~Marla